I’d like to explain to you how to draw chessboards by hand in perfect perspective, using only a straightedge. In this post, I’ll explain how to construct chessboards of any size, starting with the size of the basic unit square.
 This post follows up on the post I made yesterday about how to draw a chessboard in perspective view, using only a straightedge. That method was a subdivision method, where one starts with the boundary of the desired board, and then subdivides to make a chessboard. Now, we start with the basic square and build up. This method is actually quite efficient for quickly making very large boards in perspective view.
I want to emphasize that this is something that you can actually do, right now. It’s fun! All you need is a piece of paper, a pencil and a straightedge. I’ll wait right here while you gather your materials. Use a ruler or a chop stick (as I did) or the edge of a notebook or the lid of a box. Sit at your table and draw a huge chessboard in perspective. You can totally do this.
Start with a horizon, having two points at infinity (orange), at left and right, and a third point midway between them (brown), which we will call the diagonal infinity. Also, mark the front corner of your chess board (blue).

Extend the front corner to the points at infinity. And then mark off (red) a point that will be a measure of the grid spacing in the chessboard. This will the be size of the front square.
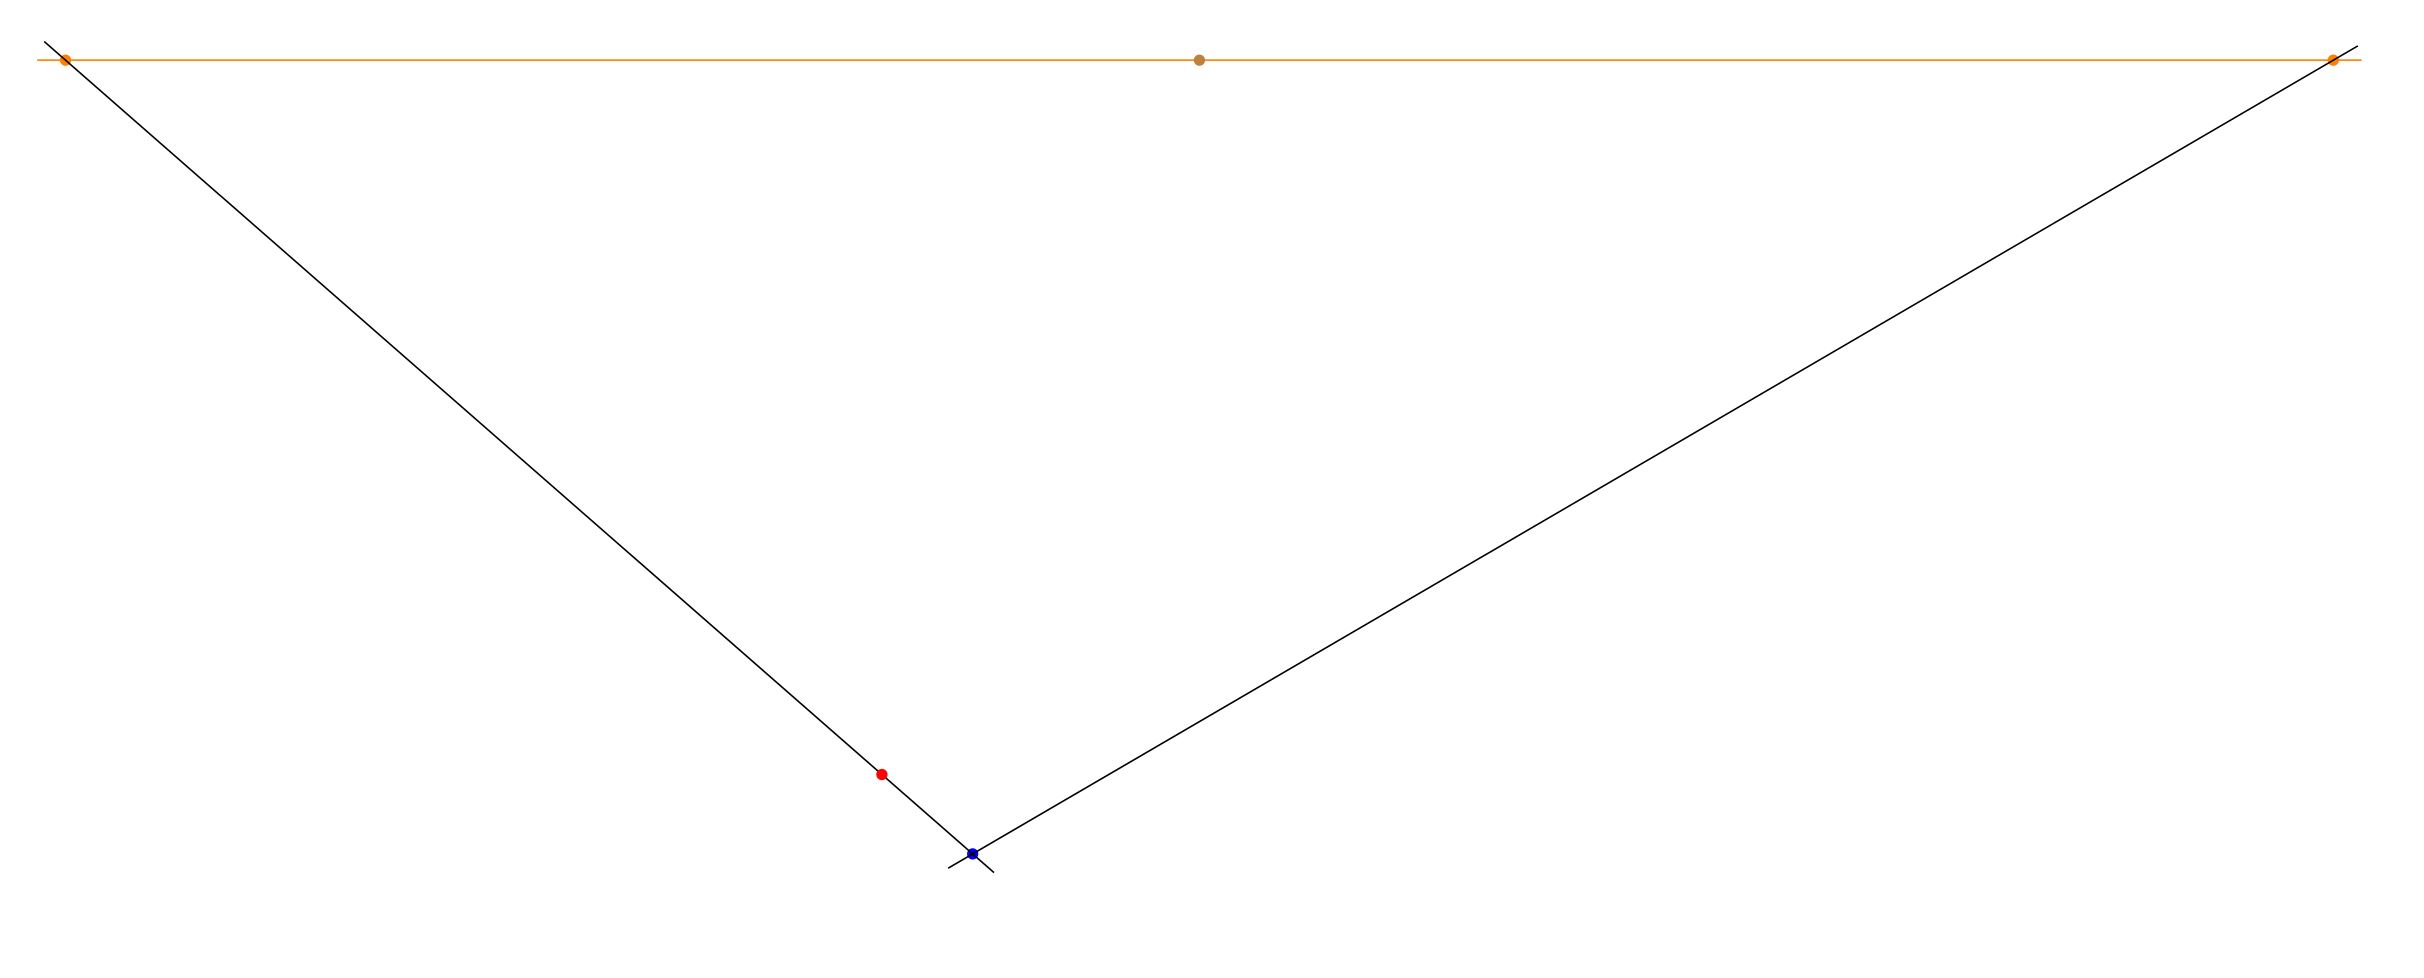
You can extend that point to infinity at the right. This delimits the first rank of the chessboard.
![]()
Next, extend the front corner of the board to the diagonal infinity.

The intersection of that diagonal with the previous line determines a point, which when extended to infinity at the left, produces the first square of the chessboard.

And that line determines a new point on the leading rank edge. Extend that point up to the diagonal infinity, which determines another point on the second rank line.
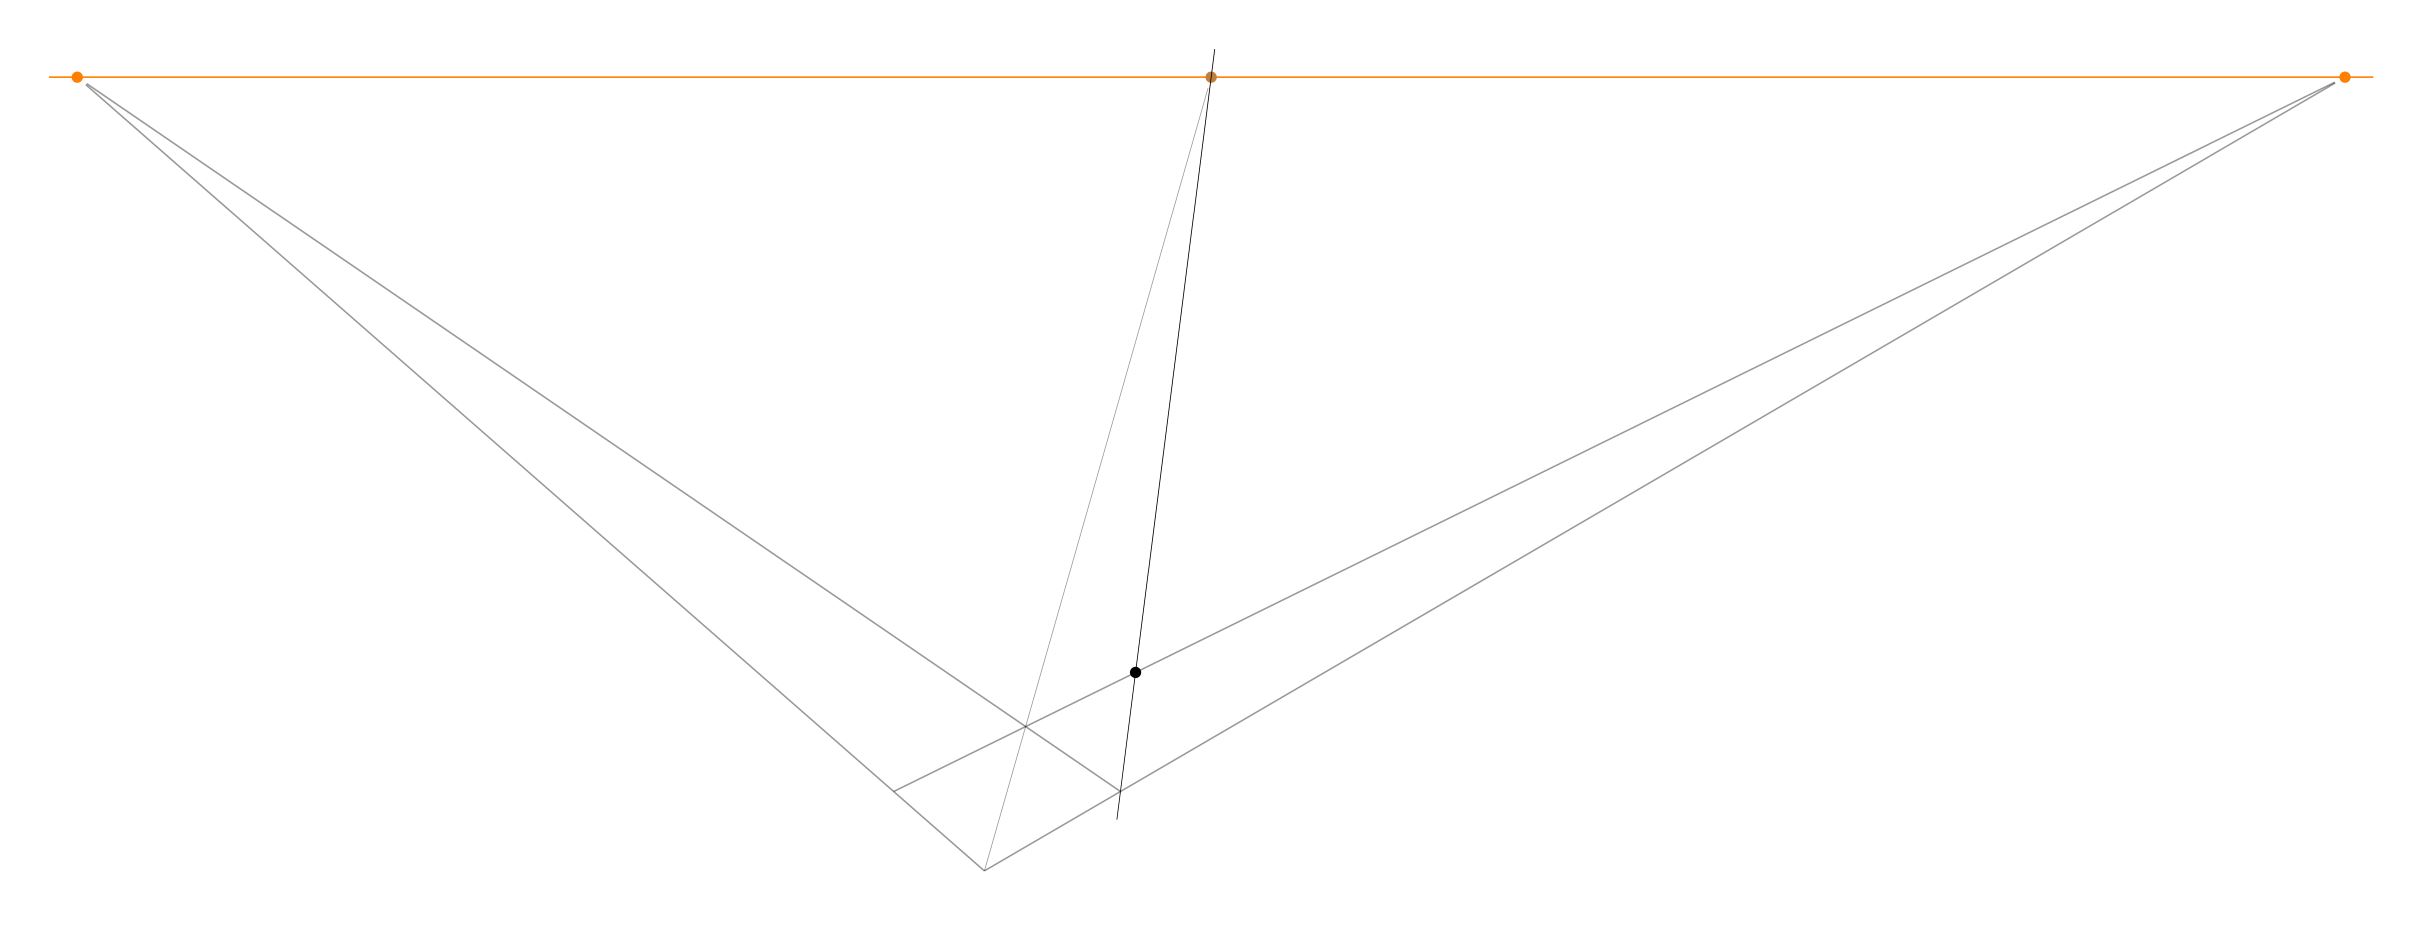
Extend that line to infinity at the left, which determines another point on the leading rank edge.

Continuing in this way, one can produce as many first rank squares as desired. Go ahead and do that. At each step, you extend up to the diagonal infinity, which determines a new point, which when extended to infinity at the left determines another point, and so on.

If you should now reflect on the current diagram, you may notice that we have actually determined many further points in the grid than we have mentioned — and thanks to my daughter Hypatia for noticing this simplification — for there is a whole triangle of further intersection points between the files and the diagonals.
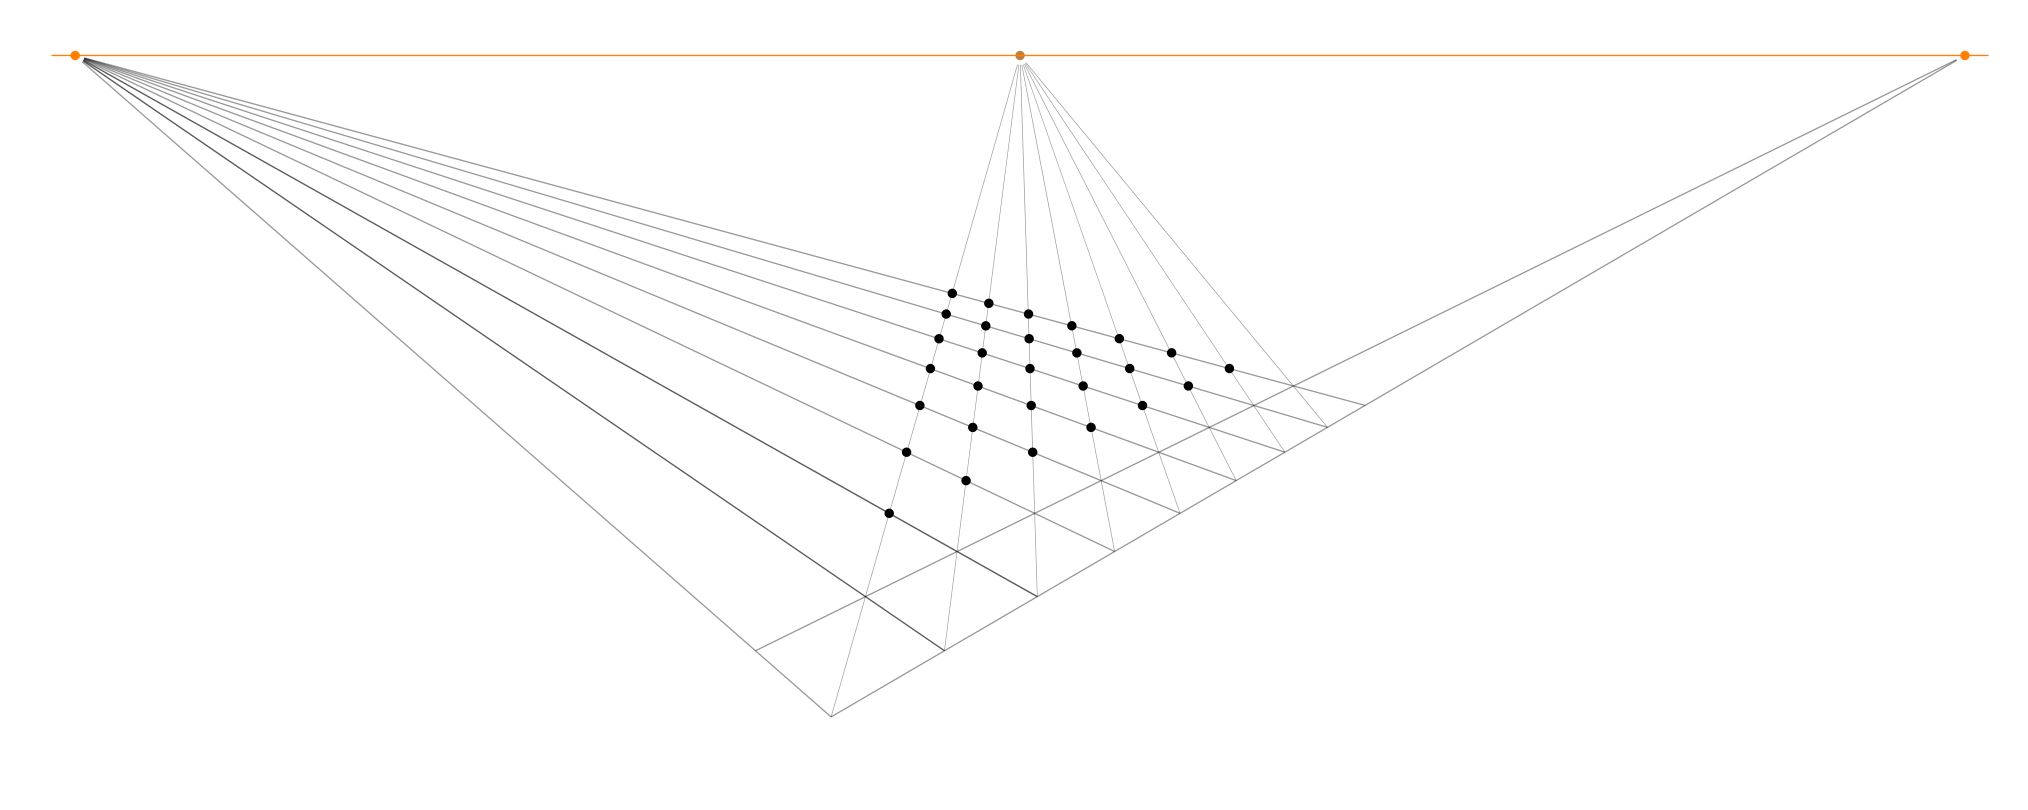 We can use these points (and we do not need them all) to construct the rest of the board, by drawing out the lines to infinity at the right. Thus, we construct the whole chessboard:
 One can construct a perspective chessboard of any size this way, and one can simply continue with the construction and make it larger, if desired.
It will look a little better if you add a point at infinity down below (and do so directly below the diagonal point at infinity, but a good distance down below the board), and extend the board downward one level. The corresponding diagram on yesterday’s post might be helpful.
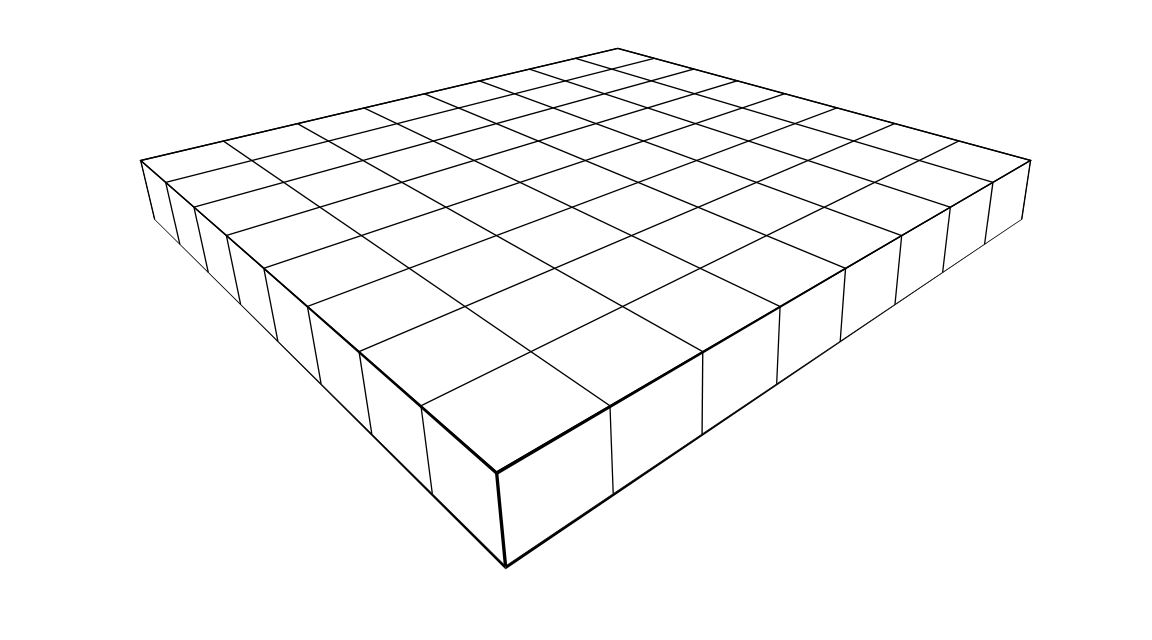
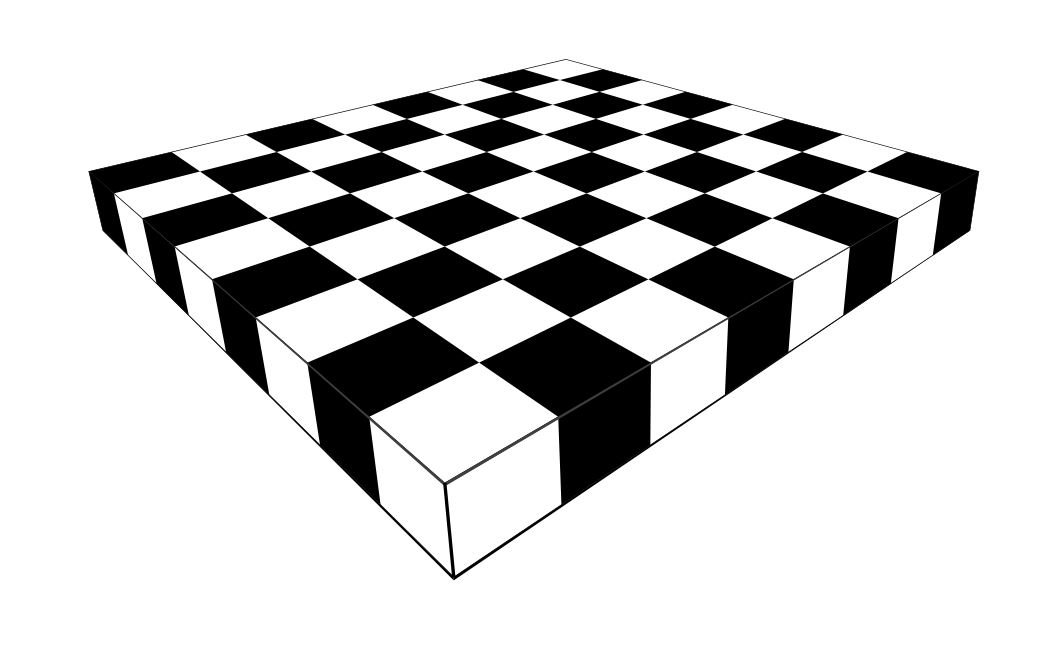
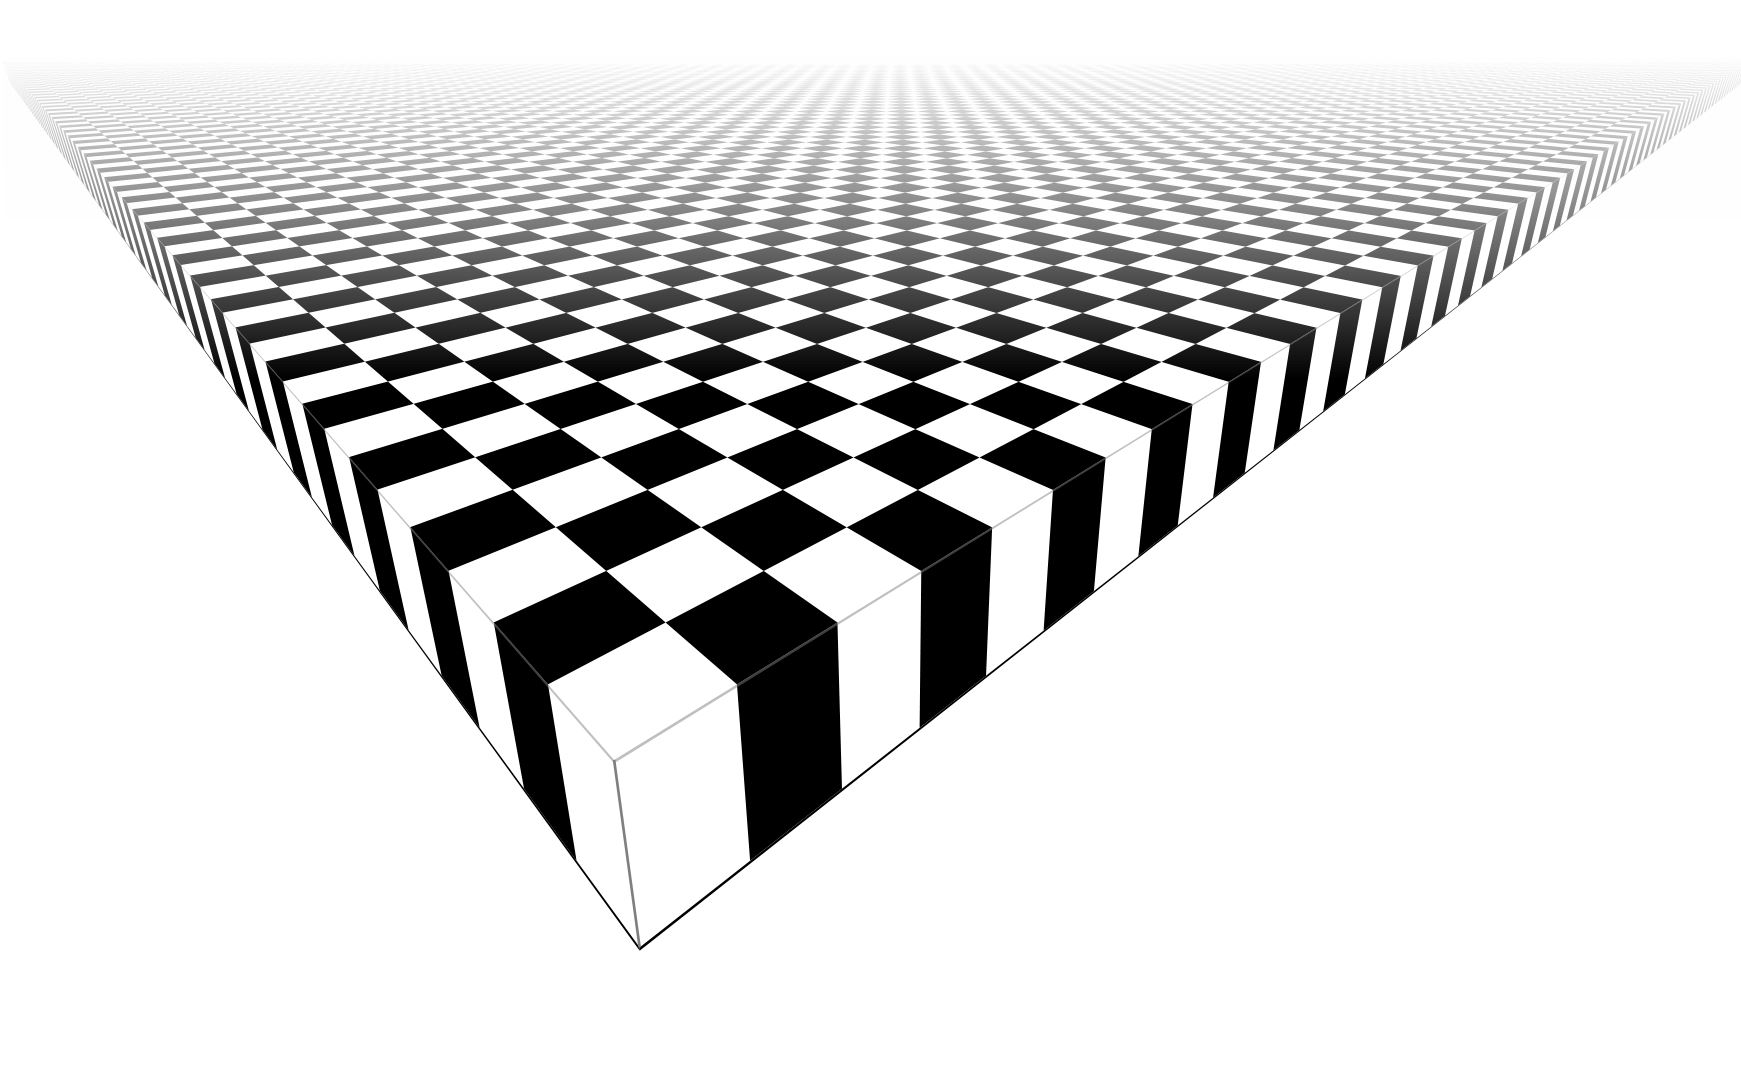
You can now color the tile pattern, and you’ll have a chessboard in perfect perspective view.
If you keep going, you can make extremely large chessboards. In time, I hope that you will come to learn how to complete an infinite chess board in finite time.
Pingback: Draw a chessboard in perspective view, using straightedge only | Joel David Hamkins
I have updated the post to include an efficiency noticed by my daughter (age 12). Previously, I had used the diagonal lines on the left side of the board also, but she noticed that one needn’t do that, because of the points already determined on the right (as now described above in the current post).
It seems to me that in order to make an $n\times n$ chessboard (with $n+1$ lines in each direction), this method will require $2(n+1)+n=3n+2$ many construction lines in total. This seems likely to be optimal, but can we prove this?
> and a third point midway between them (brown)
Does this point have to be exactly the middle? I don’t think so because of the “only straightedge” constraint, but I’m not sure of the meaning of “midway” in English. In geometry, is it “somewhere between the two points” or “exactly the middle”? (I’m not native English speaker)
This is a critical point. You are right that with straightedge only, you cannot construct the exact midpoint (you can prove this by observing that it is not invariant under the transformations of projective geometry, although these preserve straight lines). The point of the construction is that the chessboard will still look good even if you do not use the exact midpoint. A similar issue affects the other construction method, where you fix the initial square, since the corresponding diagonal point at infinity may not be the midpoint.
This explanation is genius!
I am disappointed with the final image in this post, an “infinite” checkerboard that does not go to infinity. At distance, the fog takes over and hides the interesting parts, where the parallel lines converge.
I am sorry to disappoint. You are, of course, welcome to produce your own image.
Hi Joel – I’m reading your book on Philosophy of Mathematics loving it. (Incidentally I’m trained as a logician, have published theorems about stable theories and groups, but I’ll leave that story for another time.) The reason I stopped by was to ask about any recommendations you might have for material similar the perspective chessboard. When I encountered that section in the book, my first thought was, wow, my daughter would love this – she’s a 5th grader – and am wondering if you’ve come across similar things in your wide-ranging exploration of mathematics. To be concrete, I’m interested something hands on and constructive, ideally with pencil and paper, and with connections to the rich cultural history of geometry or mathematics.
Cursory searches have led me to ‘Perspective and Projective Geometry’ by Crannell et al. That may be too advanced.
I’ve also found your posts on Orthoprojections and Fold-punch-and-Cut symmetry. (Thank you for creating the PDFs! 🙏)
I am so glad to hear that you are enjoying my book! Regarding the chessboard, I have a few blog posts on this at https://jdh.hamkins.org/chessboard-in-perspective/ and https://jdh.hamkins.org/draw-an-infinite-chessboard-in-perspective/, which may be what you are looking for. I think your daughter would be able to do both of those challenges, but please come back and let us see some pictures of her work!
Zohar wasn’t as interested in this as her dad is, alas. However I did find, entirely by chance, a related activity instead: I arrange a few wooden blocks on the table in front of us forming a rectilinear volume – similar to those in your orthoprojections post – and say, “okay, let’s draw these in perspective.” Even though she’s very accomplished at sketching and drawing, I realized I’ve discovered a visual task that is so straightforward for an adult that we would not even pause to consider it, but seems very difficult for a child. Even if my sketches are wobbly and warped, they are manifestly a two-dimensional image of something that can exist in three-dimensional space – and I can quickly execute the sketch – while she struggles, and erases and redraws, only to produce a three-dimensional impossibility. Now that her competitive spirit is piqued, I think I can get her to practice this for a while. Once her technique is perfected, it will be time to demonstrate that, to sketch such a volume in perspective, one can start by choosing two distinct points on “a line at infinity” as reference points to align the faces.